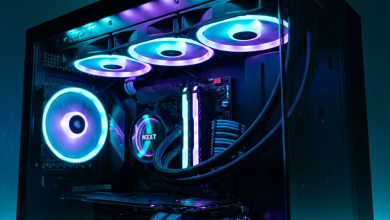
Cable management separates amateur builds from professional-looking systems. Beyond aesthetics, organized cables
improve airflow, simplify troubleshooting, make future upgrades easier, and demonstrate attention to detail. Quality
cable management requires planning, patience, and appropriate accessories—but the results justify the investment in
any gaming build.
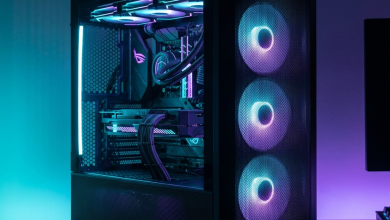
Modern cases provide extensive cable management features that go underutilized by many builders. Grommets, routing
channels, Velcro straps, and dedicated compartments enable clean results when properly leveraged. Understanding
available options and optimal routing paths transforms cable chaos into organized elegance.
This comprehensive guide covers cable management techniques, accessories, and strategies for clean gaming PC builds.
I. Planning Your Cable Routes
Successful cable management begins before the first component installation.
Case Assessment
Study your case layout before building:
- Routing holes/grommets: Identify all cable pass-through points between main and rear
compartments - Mounting points: Locate tie-down anchors, Velcro loops, and routing brackets
- Rear compartment depth: Measure space behind motherboard tray for cable storage
- PSU shroud: Note any cable pass-throughs integrated into PSU covers
Component Placement Strategy
Position components considering cable routing impact:
CPU Power: Plan route from PSU (bottom rear) to CPU connector (top of motherboard). This longest
cable run benefits most from planning.
GPU Power: PCI-E power cables route from bottom/rear to graphics card. Consider cable management
bars or GPU support brackets with integrated routing.
Front Panel: USB, audio, and power switch cables connect along bottom edge—plan routing from front
panel origin to header destinations.
Storage: SATA power and data cables may run to multiple locations. Cluster storage devices when
possible to minimize cable sprawl.
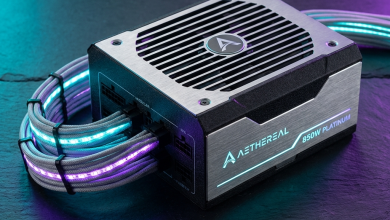
Modular PSU Advantage
Fully modular power supplies dramatically simplify cable management by eliminating unused cables entirely.
Semi-modular PSUs include essential cables (24-pin, CPU) while making peripheral cables optional. Non-modular PSUs
provide all cables regardless of need, complicating management.
For clean builds, invest in modular power supplies. The premium is recovered through easier building, better airflow,
and cleaner aesthetics.
II. Essential Cable Management Accessories
Velcro Cable Ties
Reusable Velcro straps should be every builder’s primary organization tool:
- Adjustable and repositionable during building process
- Easy removal for future modifications
- No risk of damage from overtightening
- Multiple color options for organization coding
Avoid single-use zip ties for internal PC cables. While zip ties create tighter bundles, they require cutting for any
modification and risk cable damage if overtightened.
Cable Combs
Cable combs align individual wires within cables for uniform, parallel appearance:
24-pin combs: Organize main motherboard power into neat rows
8-pin combs: Align CPU and GPU power cables
6-pin combs: Manage older GPU configurations
Combs dramatically improve visible cable aesthetics, transforming twisted bundles into precisely aligned runs.
Essential for builds emphasizing visual presentation.
Custom Sleeved Cables
Aftermarket sleeved cables offer superior aesthetics compared to stock PSU cables:
- Color coordination with build theme
- Flexible sleeving that holds shape better
- Appropriate lengths for specific case/configuration
- Premium appearance worth displaying
Custom cables require PSU compatibility verification—different manufacturers use different pinouts. Purchase cables
specified for your exact PSU model or from the PSU manufacturer.
Cable Management Bars and Channels
Aftermarket cable management bars mount to GPU bracket, hiding power cables behind solid cover. Some include GPU
support functionality, serving dual purposes.
Adhesive cable channels route cables along specific paths when case-provided options prove insufficient. These work
particularly well for chassis fan cables in positions without nearby routing holes.
III. Step-by-Step Cable Management
Pre-Build Preparation
- Dry-fit all cables before connecting anything—understand routing paths first
- Identify which cables you’ll need from modular PSU
- Install Velcro straps in accessible locations before populating case
- Plan route for each major cable category
Power Cable Routing
24-Pin Motherboard Power:
- Route from PSU through nearest grommet to right side of case (bottom/rear)
- Run cable along rear compartment, secured to mounting points
- Enter main compartment through grommet nearest 24-pin header (right edge of motherboard)
- Connect with straight approach to header—no visible slack
CPU Power (4+4 or 8-pin):
- This is typically the longest route—start planning here
- Route from PSU up rear compartment along top edge
- Enter main compartment through top-left grommet
- Connect to CPU power header near top-left motherboard corner
- Secure excess cable in rear compartment—don’t leave slack visible
GPU Power:
- Route from PSU to grommet nearest GPU position (typically right-center)
- Enter main compartment and run toward GPU mounting position
- Use cable management bar if available to hide final approach
- Consider daisy-chain vs individual cables based on visible result
Front Panel and Data Cables
Front panel connectors (power, reset, LED, USB, audio) originate from case front and connect to motherboard headers
along bottom edge:
- Bundle front panel cables together using small Velcro straps
- Route along case bottom toward motherboard headers
- Tuck excess length into PSU shroud when available
- Make final connections—these small cables benefit from organization
SATA cables for storage devices:
- Use right-angle connectors when available for cleaner drive connections
- Route data cables alongside power cables when destinations align
- Group cables serving multiple drives into single managed bundle
Fan and RGB Cables
Case fans and RGB lighting create numerous small cables requiring organization:
- Route to nearest headers using most direct path possible
- Use fan hubs or RGB controllers to reduce motherboard header runs
- Secure in groups sharing common routing paths
- Tuck controllers into hidden positions (PSU shroud, rear compartment)
IV. Rear Compartment Management
The space behind the motherboard tray stores excess cable length invisibly—but organized storage matters for
serviceability.
Organization Strategies
Layered approach: Route cables in layers based on function—power cables as bottom layer, data cables
above, front panel on top. This enables accessing specific cable types without disturbing others.
Pathway dedication: Establish specific zones for different cable runs. Left edge for CPU power
routing, center for PSU distribution, right for front panel consolidation.
Excess management: Coil excess cable length neatly rather than stuffing randomly. Secured coils
maintain organization; stuffed tangles create problems for future modifications.
Rear Panel Closure
Poor rear compartment management manifests as difficulty closing the back panel:
- Distribute cable bulk across available space—don’t concentrate in one area
- Flatten cable runs where possible using wide Velcro straps
- Ensure no cables block panel mounting points
- Test closure before final dressing—adjustments after completion frustrate
V. Advanced Techniques
Cable Combing Process
- Install comb near cable end, leaving space for connector
- Straighten individual wires into parallel alignment
- Work comb along cable length while maintaining separation
- Add additional combs for longer runs (every 4-6 inches)
- Photograph angles to verify uniform appearance
Custom Length Cables
For perfectionist builds, measure exact cable lengths needed:
- Route placeholder cables through intended paths
- Mark required length at connection points
- Order custom cables in measured lengths
- Install final cables with minimal excess
Hardline Cable Routing
Premium builds may incorporate rigid cable routing for display-oriented segments:
- Use pre-shaped cable guides for specific routes
- Create right-angle appearances where cables change direction
- Maintain parallel lines for maximum visual impact
VI. Maintenance and Modifications
Good cable management anticipates future changes:
Leave service slack: Allow slight excess at connections enabling component removal without complete
cable rerouting.
Document your routes: Photograph completed cable management for reference during future
modifications.
Use tool-free securing: Velcro enables adjustments; zip ties require cutting and replacement.
Plan for upgrades: Consider where new cables might route—larger GPU, additional storage, more fans.
VII. Conclusion
Cable management elevates gaming PC builds from functional to impressive. Planning routes before component
installation, using appropriate accessories, and patiently organizing cables create clean results that improve both
aesthetics and airflow.
Invest in Velcro straps, cable combs, and modular power supplies for best results. Take time to route each cable
thoughtfully rather than rushing toward completion. The satisfaction of a cleanly built system justifies extra
effort during construction.
For related content, explore our PC case guide and complete PC
building guide.